Showing posts with label Recipes. Show all posts

Making Veggies Fun with Country Crock

Sunday, April 15, 2012


This post is sponsored by Country Crock. I was selected for this opportunity as a member of Clever Girls Collective, and the content and opinions expressed here are all my own.
_____

Do you have a picky eater on your hands? Are vegetables the last things your child wants to touch let alone eat? I have a fun solution to your problem. Country Crock has launched the Crock Country Chronicles a place where moms are excited to serve veggies because they fly off plates! The Crock Country Chronicle is an excellent resource for quick and simple tips and recipes to help make serving veggies fun.

Right now on the Crock Country Chronicles you can download the free recipe book titled A Very Veggie World by Clare Crespo. It offers 25 of the funnest, yummiest, and easiest recipes that will make veggies fun for you and your kiddos.

The Clare Crespo cookbook offers everything from Mushroom Gnomes to Bear Paws. Even Veggie Stoplights and Beautiful Butterflies. Take a look at some of their fun veggie ideas.


Today I get to share with you one of the fabulous recipes from that very cookbook. I chose to make the Veggie Pets for my son. 


The exact recipe is below...

Ingredients:

4 new potatoes
4 snap peas
4 kernels of frozen corn
24 fresh rosemary leaves
2 Tbsp. Country Crock® Spread,
melted
1/4 tsp. ground black pepper
1/4 tsp. salt

Instructions:

Bring 1-inch of water in medium saucepan to a boil
over medium high heat. Cut a slice off the long side of
the potatoes so they do not roll. Place potatoes, cut side
down, in steamer basket and place in pan.

Cover and steam for 10-15 minutes, until tender.
Carefully, with tongs, remove potatoes and add snap
peas to basket to steam for 5-10 minutes. Remove peas
and cut tips off to make hamster’s “ears.’’ Remove eight
peas from pea pods.

Using chopsticks or small knife, poke two holes into the
top of the potato. Insert snap pea pieces into top of the
potato for the pet’s ears.

Use chopsticks or a small knife to make three holes on
front of potato and insert peas for “eyes’’ and corn kernel
for “nose.’’ Use a toothpick to poke a few holes around
the nose and insert rosemary leaves for “whiskers.” Brush
pets with Country Crock® Spread and sprinkle with salt
and pepper.


I improvised with mine and used squash for the ears instead of snap peas. It was still just as yummy and just as fun. I wish that I had snapped a photo of the smile that was on my son's face as he ate his veggie pet. He thought this was pretty cool. Now I can't wait to try out more of the recipes!

 To learn more about Country Crock please feel free to visit:

           Country Crock’s Facebook page: Facebook
          Country Crock’s Twitter page: Twitter 
_____

Are you looking for quick and simple tips and recipes to make serving veggies more fun?

Download the free Clare Crespo Cookbook here
for fun and whimsical recipes your family is sure to love!

Shrimp Stir-Fry

Tuesday, April 10, 2012

Oh boy do I have a yummy recipe for you today! It comes straight from our mother’s kitchen. It is one of the best stir fry’s you will ever have. It is light and fresh and not greasy like a lot of stir fry’s that I have had. You have got to try this!

SONY DSC

Ingredients:
· 4 teaspoons canola oil
· 3 ½ tablespoons soy sauce
· 3 garlic cloves, minced
· 2 tablespoons fresh ginger, minced
· 1 ½ pounds medium peeled and deveined shrimp
· 8 ounces white mushrooms, sliced
· 4 scallions, chopped
· 1 large bell pepper, cut into strips
· 8 ounces snow peas
· 1/4 teaspoon red pepper flakes

Stir together 2 teaspoons of oil, 1 ½ tablespoons of soy sauce, and garlic in a large bowl; add shrimp and toss to coat.

Lightly coat a large skillet or wok with cooking spray and heat over high heat. Add shrimp and cook until pink about 2 minutes. Transfer to a plate.

Heat the remaining oil in the same skillet still over high heat; add ginger and cook for 30 seconds. Then add mushrooms, scallions, bell peppers, snow peas and red pepper flakes and cook until vegetables are still crisp, but tender about 4 minutes. Stir in the shrimp and the remaining soy sauce.

Then enjoy!

Chimichurri Fish Tacos with Avocado Corn Salsa

Wednesday, March 28, 2012

SONY DSC
I don’t know about you, but my food preferences change with the seasons. Without me even realizing it in the Winter I gravitate towards soups, meats and potatoes, recipes that include heavy creams. I almost don’t even think about vegetables. Then Summer rolls around and all of the sudden I am practically a vegetarian. Besides all of the hamburgers and hot dogs that we throw on the grill everything I eat is fresh and colorful.

Well the weather has been heating up here in Denver and so has my need for eating fresher foods. The other night I took my first step towards my Spring/Summer eating habits. I made chimichurri rubbed fish tacos with an avocado corn salsa. They were delicious!

Ingredients:
Chimichurri Rubbed Fish:
  • 1 lb Cod
  • 2 tablespoons olive oil
  • 1 tablespoons red wine vinegar (white wine vinegar would work fine too)
  • 1 tablespoon parsley flakes
  • 2 teaspoons oregano
  • 1/2 teaspoon garlic powder
  • 1 teaspoon salt
  • 1/4 teaspoon pepper
  • 1/4 teaspoon red pepper flakes
Avocado Corn Salsa:
  • 2 avocados, diced
  • 8 oz. can corn
  • 1 jalapeno, diced
  • 1/2 cup cilantro, chopped
  • 1 red bell pepper, diced
  • 1 small red onion, diced
  • juice from 2 limes
  • salt to taste
Combine parsley flakes, red wine vinegar, oregano, garlic powder, salt, pepper, and red pepper flakes in a bowl stir together. Lay cod in a 9 x 13 baking dish. Cover the cod in olive oil. Next rub the cod with the chimichurri mix. Place in oven at 375 degrees for 20 minutes.

Then combine your salsa ingredients in a bowl and stir together. Refrigerate for a few minutes before serving.

When cod is cooked, cut into smaller pieces. Lay cod inside warm corn tortillas and then top with avocado corn salsa.

Enjoy!

SONY DSC

41D7BC788C40AFDD713E5833753FB8F5

Pumpernickel Sandwich

Thursday, February 23, 2012

I want to introduce you to the most delicious sandwich! I am hooked on it right now. I swear I eat one or two for lunch almost everyday. This is a sandwich that our mother would make for us on occasion when we were kids. I don’t think I really appreciated it until I was an adult. Now it has become one of my favorite sandwiches!

SONY DSC

I think that I have just decided to call this the BPT (Bacon Pumpernickel Tomato)

Ingredients:

  • Pumpernickel bread
  • Bacon
  • Tomato
  • Avocado
  • Alfalfa sprouts
  • Munster Cheese
  • (Optional) Cream cheese or hummus

This sandwich is super easy to assemble. After all it is just a sandwich. I thought I would offer some helpful tips on how best to go about it.

1. Cook your bacon. Or on lazy days, I use precooked bacon. It doesn’t even need to be reheated before putting it on the sandwich. You will be putting this sandwich in the broiler for a few minutes and the bacon will reheat during that step.

2. Start to assemble your sandwich. Lay down one slice of pumpernickel. Then spread a little cream cheese or hummus on top of the bread. I just use whichever one that I have on hand. Mostly it is used for texture rather than taste. This will soften the sandwich a little. My husband thinks the sandwich is too dry without that addition of cream cheese. I like it with or without. So if you don’t have some cream cheese on hand- no worries, it will still taste great.

3. Add the rest of your ingredients. I usually layer mine bacon first(2 slices), then tomato(2 slices), next avocado slices(about 5 slices or 1/2 an avocado), then I add the sprouts, and finally I top it off with the Munster cheese. Obviously the order of the ingredients isn’t a huge deal, but if I put the tomato or avocado on the bottom then I usually find the ingredients slide right off the bread, and sometimes onto the floor leaving me sad and very hungry. I’d play it safe with the bacon on the bottom :)

4. Put the sandwich in the oven on a low broil for about 3 minutes or until the cheese starts to bubble and turn brown. This step also crisps up the edges of the bread which is one of my favorite parts about this sandwich.

5. Enjoy!

SONY DSC

41D7BC788C40AFDD713E5833753FB8F5

Mexican Shrimp Cobb Salad

Wednesday, October 26, 2011

This is my first pinterest recipe I have made and it is divine! A yummy salad with shrimp, avocados and a heavenly dressing. You really can't go wrong here. This salad reminds me of a cafe rio salad but so much easier with much less steps and mess. The only thing I would have changed is sauteing the shrimp first to make them crispy and add heat to the salad. The salad dressing actually comes from my sister, Lauren who found it in a cookbook. Thanks sis for putting this salad over the top delicious.

For the dressing:
1 cup mayo
1/2 cup milk or buttermilk
1 lime, juiced
1 package hidden valley ranch dressing (ignore the directions)
2 garlic cloves
1/2 cup cilantro
1/4 cup Salsa Verde

For the salad:
16 oz. cooked large shrimp, peeled
chili powder to taste
1 TBSP lime juice
salt, to taste
1 romaine heart, shredded
1 (15 oz.) can black beans, rinsed and drained
1 c. corn kernels, fresh or frozen
2 tablespoon red onion, chopped
2 tablespoon cilantro, chopped
juice of 1/2 lime
1 seedless cucumber, diced
2 c. diced tomatoes
1 ripe hass avocado, diced
1 c. reduced-fat Mexican blend shredded cheese

Directions:
1. To make the dressing, combine all ingredients in a food processor or blender. Refridgeate for at least 1 hour to let thicken. Can be made up to 3 days in advance.

2. To prepare the shrimp, rinse and chop into large chunks. Toss with chipotle powder, lime juice, and salt.

3. In a small bowl, combine drained beans, corn, red onion, cilantro, lime juice and salt to taste.

4. In a large glass dish or clear bowl, layer the salad ingredients in the following order: lettuce, black bean mixture, cucumber, tomatoes, avocado, cheese and shrimp.

*if wanting to saute the shrimp, let the shrimp marinade in the chili powder, lime and salt for 15 minutes. Heat 1 tablespoon olive oil in saute pan. Add the shrimp for just a few minutes to allow to crisp up and heat through.

Chicken Enchilada Soup

Wednesday, October 12, 2011

I think it is fairly obvious now of my serious love for soup. I love making soups and eating them even more. This soup is no exception. So delicious and ridiculously easy to whip together. What makes this recipe the quickest to prepare is if you already have precooked shredded chicken. I do this once a month. I put 8 chicken breasts in a crock pot with 1 tsp. garlic salt and about 1/2 chicken broth. Cook on low for 8 hours and have perfectly cooked shredded chicken. I get about 4 bags with 2 cups shredded chicken each. Perfect for just about any recipe that calls for chicken. You can make this soup spicy if you want and can interchange the ingredients so easy to what you love.


Chicken Enchilada Soup

2 cups shredded chicken
1 can chicken broth
1/2 cup chopped onion
2 cloves garlic, minced
1 can tomato soup
1 can diced tomatoes or Rotel
1 can black beans, drained and rinsed
1 cup frozen corn (or 1 can corn)
1 tsp chili powder
1 tsp cumin
1 tsp garlic salt
1 tsp onion powder
1 tsp salt

Saute onion and garlic in 1 T oil until softened. Dump the rest of the ingredients in the pot. Stir to combine. Simmer for 30 minutes. Top with sour cream, crushed tortilla strips, cheese or what else sounds delicious. Enjoy.

*if you want this more spicy, up the chili powder to 1 Tablespoon and add a can of diced green chilies.
*If not using pre-shredded chicken, cut chicken in bite size pieces and cook with the onions and garlic until no longer pink


Chicken Cordon Bleu Casserole (freezer meal)

Thursday, October 6, 2011

Chicken Cordon Bleu is so delicious but so labor intensive. This recipe is the perfect way of getting the same flavor without all the work. This meals even comes together so quick that we ate dinner at 4:45 last night because I thought it was going to take much longer than it did.


Chicken Cordon Blue Casserole

2 lbs chicken breasts
1 can cream of chicken soup
1 cup milk
8 ounces shredded swiss cheese
1/2 cup cheddar cheese
1/2 pound ham sliced in strips
salt
pepper
1 box stuffing mix

Preheat oven to 350 degrees. Prepare stuffing mix according to package. While that is cooking, cut chicken into bite size pieces. Heat a pan with 1 tablespoon oil. Saute chicken until no longer pink inside. Season with salt and pepper. Mix together milk and soup in bowl. Layer the casserole dish with chicken, ham, cheese, soup mixture, top with stuffing and cheddar cheese.
Bake for 30 minutes or until golden brown on top.

If you are going to freeze this dish, don't bake in the oven at this time. Just cover with foil and freeze for up to 2 months. Thaw in the refrigerator the night before. Bake for 30 minutes, uncover and bake for an additional 15 minutes.

Zucchini Bread

Thursday, September 29, 2011

With fall in the air, what a better way to start heating up the kitchen then by baking bread. But not just any bread. How about delicious, light, fluffy zucchini bread?! This recipe is really hard to mess up. Plus, it won't leaving you feel like you just ate a brick, or like there is peanut butter stuck to the roof of your mouth. Go give it a try!

SONY DSC

Zucchini Bread

1 pound zucchini (you’ll end up with about 1 to 1 1/2 cups of zucchini once it has been shredded and wrung through a towel to rid of excess liquid)
2 cups flour
1 teaspoon baking powder
1 teaspoon baking soda
1 teaspoon salt
1 teaspoon ground cinnamon
1 teaspoon allspice
1 1/2 cups granulated sugar
2 large eggs
1/4 cup plain yogurt (not fat-free)
1 tablespoon fresh lemon juice or sour cream
6 tablespoons butter melted

Preheat the oven to 375 degrees. Generously coat a 9-inch by 5-inch loaf pan with cooking spray.

Chop the ends off the zucchini (just 1/4-inch off each end) and finely shred the zucchini. Place the shredded zucchini in a clean kitchen towel and squeeze out all the excess water. You should have about 1 to 1 1/2 cups of dry zucchini. Set the zucchini aside.

In a large bowl, sift together the flour, baking soda, baking powder, cinnamon, allspice, and salt. In a smaller bowl, whisk the sugar, yogurt, eggs, lemon juice or sour cream, and butter until combined.

Gently fold the yogurt mixture and zucchini into the flour mixture, using a rubber spatula to fold the ingredients together until just combined. Transfer the batter to the prepared pan.

Bake until golden brown and a knife inserted in the center comes out with a few crumbs attached, 45-55 minutes. Cool for 10 minutes then place on wire-rack or plate. Store well-covered for up to three days.

SONY DSC

C593620B0C6868E716146B79220E3FB7


P.S. Angela here, first to say that this bread is AMAZING! So you should definitely give this recipe a try. Second, to plea with you. I am looking for new zucchini recipes. Look at this…

SONY DSC

We over planted our zucchini this year. We ate so much zucchini this summer! We ate steamed zucchini(my personal favorite, just plain and simple) stuffed zucchini boats, zucchini parmesan crisps, zucchini crusted pizzas, and even this delicious zucchini bread! I currently have 23 giant zucchini sitting in my kitchen, that’s after giving a lot away! So what other recipes zucchini recipes should I try? I would love to hear how you use your zucchini. Let me know what recipes you use. Maybe we will even feature some here!

Thanks! I can’t wait to try your recipes.

41D7BC788C40AFDD713E5833753FB8F5

Corn Chowder with Shrimp

Wednesday, September 21, 2011

Fall starts Friday so that means soup season is back. It is my all time favorite. So two days early I thought was okay enough to start whipping up soup. This original recipe is meant for a slow cooker. When I looked at the recipe at 4:00 this afternoon I realized there would not be enough time for me to do that so I improvised and liked the results so much I don't even need to bother trying this is a slow cooker. Shrimp, sweet corn and a medley of vegetables makes this one a winner! I served this with amazing homemade rolls. That recipe to come next week.


Corn Chowder with Shrimp

2 cans chicken broth
1 cup frozen corn
1 onion, finely chopped
1 bell pepper, diced
2 carrots, cut into 1/4-inch rounds
2 russet potatoes, diced
2 bay leaves
Salt and pepper
1 pound medium shrimp, peeled and deveined
2 cups milk
3 tablespoons butter
3 tablespoons flour
2 tablespoons dried parsley

Start by chopping all your vegetables. Place chopped onion, bell pepper, carrots, potatoes, bay leaves, 2 teaspoons salt, 1/2 teaspoon pepper in large pot. Pour in both cans chicken broth. Bring to boil and let the vegetables cook for about 10 minutes, enough to soften. Meanwhile melt 3 tablespoons butter in saucepan. stir in flour to form a paste. Whisk in milk and allow to thicken for about 5 minutes. Pour the thickened milk into the veggies and chicken broth and allow the flavors to mesh. Then stir in the shrimp, parsley and corn allowing those to heat through for just a minute. Serve and thoroughly enjoy!

Stuffed Shells

Wednesday, September 14, 2011

This recipes has all of my favorites! Cheese, more cheese, ground turkey, artichokes and ricotta. All of these combined make a decadent pasta dish that you will want to make again and again. This isn't the simplest recipe. I use it for special occasions, but you will find yourself making any day a special one just so you have an excuse to make this. Best part is that it makes a ton, and is a perfect freezer meal- making the extra labor even more worth it.

Ground Turkey and Artichoke Stuffed Shells

stuffed shells


Ingredients:


1 box jumbo pasta shells 3 tablespoons extra-virgin olive oil
1/2 large yellow onion, chopped
3 cloves garlic, chopped
1 pound ground turkey
1/2 teaspoon kosher salt, plus 1/2 teaspoon
1/4 teaspoon freshly ground black pepper, plus 1/4 teaspoon
1 package frozen artichokes, thawed and coarsely chopped
1 (15-ounce) container ricotta cheese
3/4 cup grated Parmesan
2 eggs, lightly beaten
2 teaspoons dried basil
1 tablespoon dried parsley
5 cups marinara sauce
1 1/2 cups grated mozzarella

Bring a large pot of salted water to a boil. Add the pasta and partially cook until tender but still very firm to the bite, stirring occasionally, about 4 to 5 minutes. Drain pasta.

Meanwhile, in a large heavy skillet, heat the olive oil over medium-high heat. Add the onions and the garlic and cook until the onions are soft and starting to brown, about 3 minutes. Add the ground turkey, 1/2 teaspoon salt, and 1/4 teaspoon black pepper and continue to cook, stirring occasionally, until the meat is slightly golden and cooked through. Add the artichoke hearts and stir to combine. Remove from heat and let cool.

In a large bowl combine the cooled turkey mixture with the ricotta cheese, Parmesan cheese, eggs, basil, parsley, and the remaining salt and pepper. Stir to combine.

To stuff the shells, cover the bottom of a 9 by 13 by 2-inch baking dish with 1 cup of marinara sauce. Take a shell in the palm of your hand and stuff it with a large spoonful of turkey mixture. Place the stuffed shell in the baking dish. Continue filling the shells until the baking dish is full, about 24 shells. Drizzle the remaining marinara sauce over the shells, top with the grated mozzarella. If freezing, cover tightly with plastic wrap and place in the freezer.

Preheat the oven to 400 degrees F. Bake until the shells are warmed through and cheese is starting to brown- about 20 minutes.

If baking from freezer, preheat oven to 400 degrees and bake for 60 minutes covered. Last 15 minutes remove foil to let cheese brown.

C593620B0C6868E716146B79220E3FB7

Italian Beef Sandwiches

Wednesday, August 24, 2011

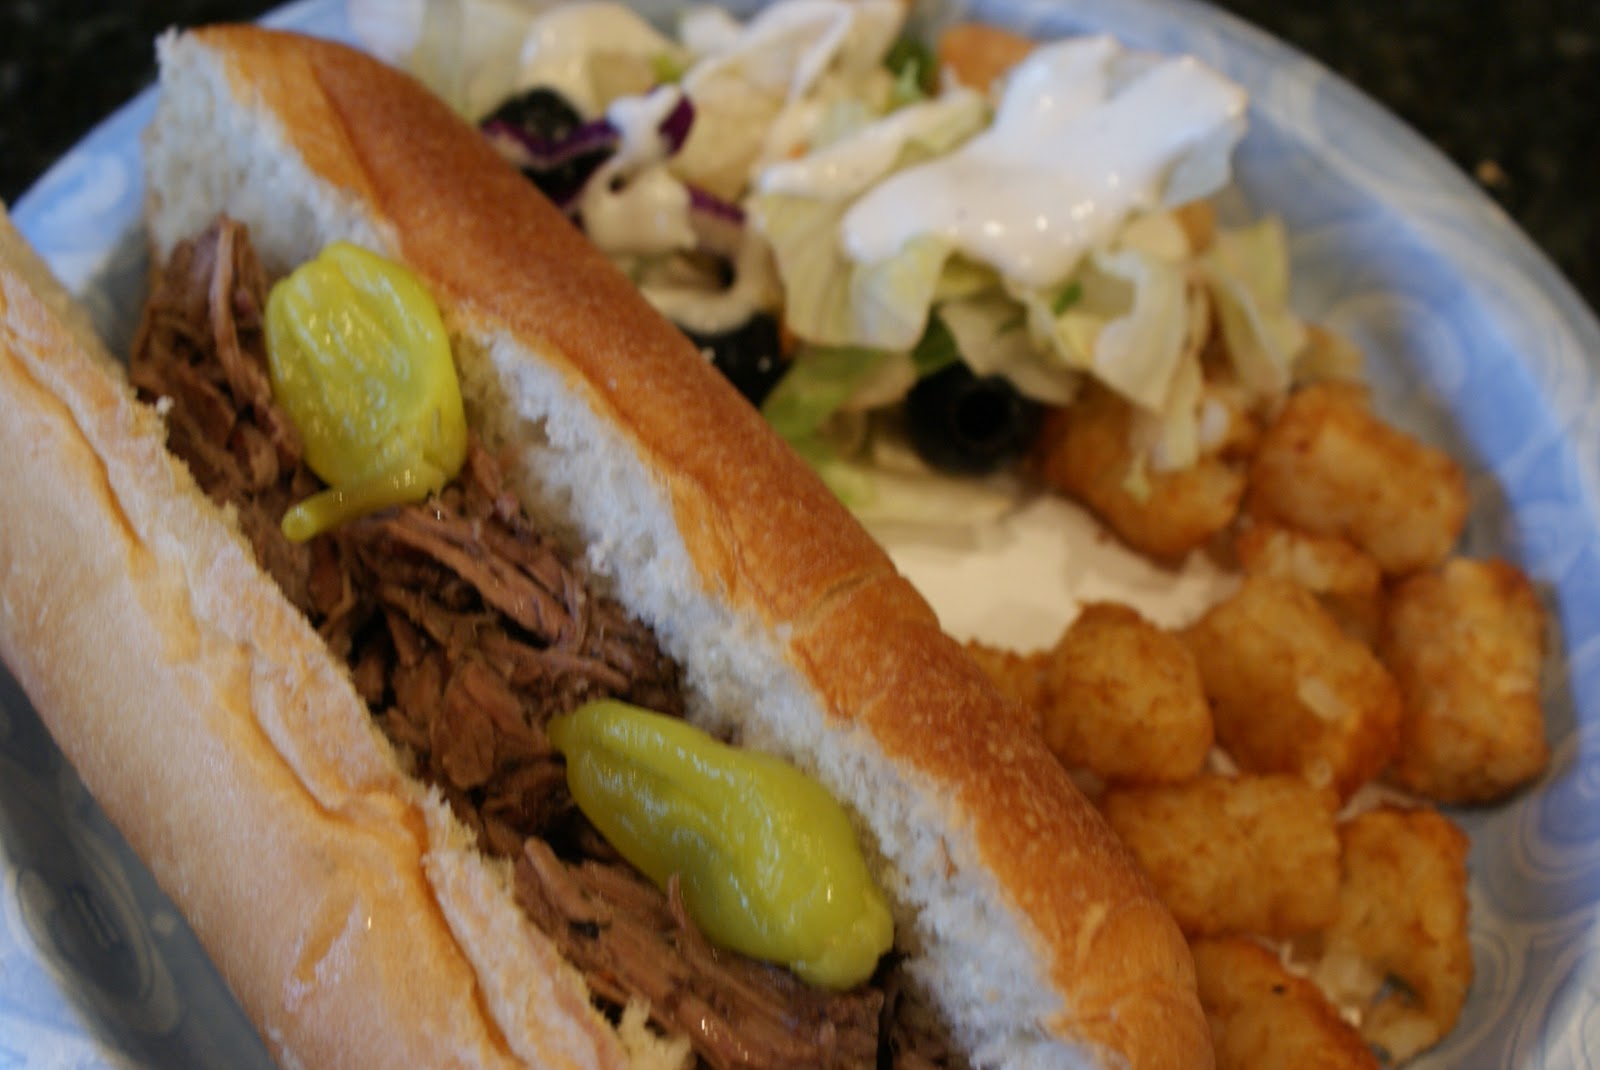
Ever been to Chicago and had an Italian beef sandwich? If you haven't, you are seriously missing out. Having grown up in Chicago this sandwich is one of those mouth watering memories I have from that place. Wanting to try to recreate these delicious sandwiches, I searched for the perfect recipe and luckily I found it on the first try. (don't you love when that happens?!) This is an inexpensive, delicious crock pot meal. There should be nothing stopping you to make this tonight.

Italian Beef Sandwiches
source: all recipes


3 cups beef broth
1 teaspoon salt
1 teaspoon ground black pepper
1 teaspoon dried oregano
1 teaspoon dried basil
1 teaspoon onion salt
1 teaspoon dried parsley
1 teaspoon garlic powder
1 bay leaf
2 (.7 ounce) package dry Italian-style salad dressing mix
1 (5 pound) chuck roast

Combine beef broth with salt, ground black pepper, oregano, basil, onion salt, parsley, garlic powder, bay leaf, and salad dressing mix in a saucepan. Stir well and bring to a boil.
Place roast in slow cooker, and pour salad dressing mixture over the meat.
Cover, and cook on Low for 10 to 12 hours, or on High for 4 to 5 hours. When done, remove bay leaf, and shred meat with a fork. Pile high on a crusty loaf of bread. For extra flavor top with cheese and/or sauted onions and bell peppers


German Pancakes

Wednesday, July 27, 2011

This recipes comes from my childhood. I can remember eating this super easy recipe a lot. The best part about it is that it only has 4 ingredients. Have too many eggs and milk about to expire? This recipe is for you. 

German Pancakes
1 cup milk
1 cup flour
6 eggs
1/2 teaspoon salt
2 tablespoons butter

Preheat oven to 350°. Place butter in a 9x13 pan and put in oven. Let the butter melt while you mixing the rest of the ingredients. In a blender, combine the rest of the ingredients until smooth. Pour over the melted butter. Bake for 30 minutes. Serve with syrup and powered sugar for extra yumminess.

Bell Peppers Stuffed with Feta and Couscous

Friday, July 1, 2011

Angela here, filling in for Whitney this week. Why, you ask? Well Whitney is in the process of moving this week while her, her daughter, and her husband are super sick. Rough week at their house. Now where is she moving to, you ask? DENVER! Yep, she is moving to come play with me for the rest of the Summer. Ok… really she is moving here because her husband has an internship in Denver this summer.  But, I get to benefit from that internship and so will you guys. Because Whitney and I are going to be together this summer, we have some fun things planned for the blog. But, we will get to that at a later date. Oh, suspense!

Today is all about my favorite summer recipe. Now my sisters may be shocked that I actually cook something. Lauren actually goes around telling people that all I do is eat out. Which is not that case at all. In fact I do not remember the last time that we actually ate out. Well dinner at least, there is no harm in meeting my girlfriend's for lunch once a week, ok maybe twice ;) Even though I do cook, I have been known to profess my hatred for cooking quite often. Although, I do not think that I hate cooking. I think that I hate doing dishes. If I cook, then I have to clean. It’s almost a no win situation. Unless, I make something so delicious! Then all the dirty dishes in the world can’t stop me.

Today, I wanted to share one of my favorite summer recipes. I crave this meal at least once a week. In the summer months that is about how often we have it. I LOVE it!

DSC06298

Bell peppers stuffed with feta and couscous. Delicious!

DSC06300

Let’s get started!

DSC06252

What you will need:

  • 3-6 Bell peppers (This recipe will stuff 6 peppers. My family can only eat 3 for dinner. Then I eat the rest of the filling for lunch the next day.)
  • 1 Zucchini
  • 1 Yellow squash
  • 1/2 Yellow onion (I know I have a red onion in the picture. That is all that I had on hand the night that  I made this. And a red onion will work, but it is a lot better with a yellow.)
  • 1 cup Cherry tomatoes, cut in half (not pictured… whoops I forgot)
  • 1 cup Feta cheese (you can use regular feta, but sometimes I like to use feta with tomato and basil. That is yummy too.)
  • 1 box of Couscous with tomato and lentils
  • 2 tsp Olive oil (again not pictured, sorry, but I think you know what it looks like :)
  • 1 tsp Oregano
  • 1 tsp Salt

Let’s get started:

First, preheat your oven to 350 degrees.

Next, start cooking your couscous according to the directions on the package.

Now start chopping your onion, zucchini and squash. Also cut your cherry tomatoes, but put those to the side for now.

DSC06255

Next cut the tops off of your bell peppers and deseed them.

DSC06269

Place 2 teaspoons of olive oil in the pan. When it has heated up add your onion, zuchinni, and squash.

DSC06257

Once your onion, zucchini and squash has started to soften- after about 5 minutes- throw in your cut tomatoes for 1 minute.

DSC06267

Next place your bell peppers in a pot of boiling water. Cook for about 3 minutes.

DSC06270

Set aside upside down to dry.

DSC06274

Once your veggies are done, combine with your couscous and feta.

DSC06277

Next, fill your peppers with the mixture and place in the oven at 350 degrees for 15 minutes.

DSC06293

Then enjoy!

DSC06303

41D7BC788C40AFDD713E5833753FB8F5

Chicken Noodle Casserole (freezer meal)

Wednesday, June 8, 2011

Our friends just had a baby, and I wanted to be bring them dinner. I already posted my go to meal when I bring someone dinner. This time I wanted to try and find another one to add to my collection. I found the perfect one. The very best thing about this recipe is that it makes so much! Not only was I able to to make a pan full to bring to our friends, but I was also able to make enough for our family to eat for dinner, a freezer meal for us, and I brought an extra pan full for them to put in their freezer. A great tip for this recipe is to go to the dollar store, and buy disposable pans so you can put those in the freezer.

*In addition to bringing them dinner I was also able to bring them diapers since I scored some super cheap diapers this week at target. Go check out that awesome deal here.

Chicken Noodle Casserole

source: Allrecipes.com 

4 large chicken breasts
2 cans cream of chicken soup
2 cans cream of mushroom soup
16 oz. sour cream
2 bags egg noodles
large bag of frozen vegetables
1 sleeve round crackers
3 tablespoons butter

* this recipe will make 2 9x13 size pans, or what I did was use 1 9x13 and 3 small 5x8 disposable pans. 

Preheat oven 350°. Cube chicken into bite size pieces. Add chicken to heated saute pan and cook until longer pink. While the chicken is cooking, cook egg noodles according to package. In a large mixing bowl combine soups, sour cream and vegetables. When the chicken and egg noodles are done, add them to the large mixing bowl. Pour into desired baking dishes. Melt the butter and add the crushed crackers to the melted butter. Sprinkle over the top. Bake for 30 minutes.

*If you are going to freeze this then don't bake and don't top with crackers. Once it is the the baking dish just cover tightly and freeze. When baking from frozen bake for 1 hour and 15 minutes at 350°. In the last 15 minutes add the crushed crackers.


Strawberry Cake

Wednesday, May 18, 2011

This fresh strawberry is to die for! My mom started making it when I went away to college so I never really learned to make it and actually forgot about it until I went home in March and she made it for Angela's birthday. I knew I would be adding this to my favorite go to desserts. It is actually very simple to make and will definitely be a big hit!


Cake
1 box white cake mix (with no pudding)
1 small box strawberry gelatin
1 cup vegetable oil
4 eggs
1/4 cup water
3/4 cup mashed strawberries (about 1 carton full)

Icing
1/2 cup butter
3 cups powered sugar
1/4 cup mashed strawberries

Preheat oven to 350 degrees. combine box of cake mix and strawberry gelatin in a large mixing bowl. Beat in oil, eggs and water. When all mixed gently fold in mashed strawberries. Pour into 2 9-inch greased cake pans. Bake for 30 minutes. Let cool completely and cover with icing.

For the icing, beat together butter and powered sugar. Fold in mashed strawberries. Ice between the layers, top and sides.


Happy Easter Series: Part 2- Easter Dinner

Thursday, April 14, 2011

I truly love Easter. For me it is always calming and relaxing and just a great day to remember my Savior. Another great part of Easter is the food. I have not made any of these recipes before so I am excited to see how they will turn out. Along with a spiral ham, here is what our dinner menu will be this year:

Spinach and Strawberry Salad

(source allrecipes.com)
  • 2 bunches baby spinach
  • 4 cups sliced strawberries
  • 1/2 cup vegetable oil
  • 1/4 cup white wine vinegar
  • 1/2 cup white sugar
  • 1/4 teaspoon paprika
  • 2 tablespoons sesame seeds
  • 1 tablespoon poppy seeds
In a bowl mix together the oil, vinegar, white sugar, paprika, sesame seeds, and poppy seeds. Add in the strawberries and spinach. Mix to coat

Sweet Dinner Rolls

(source: allreipces.com)
  • 1/2 cup warm water (11 0 degrees F/45 degrees C)
  • 1/2 cup warm milk
  • 1 egg
  • 1/3 cup butter, softened
  • 1/3 cup white sugar
  • 1 teaspoon salt
  • 3 3/4 cups all-purpose flour
  • 1 (.25 ounce) package active dry yeast
  • 1/4 cup butter, softened

  1. Place water, milk, egg, 1/3 cup butter, sugar, salt, flour and yeast in the pan of the bread machine Select Dough/Knead and First Rise Cycle; press Start.
  2. When cycle finishes, turn dough out onto a lightly floured surface. Divide dough in half. Roll each half into a 12 inch circle, spread 1/4 cup softened butter over entire round. Cut each circle into 8 wedges. Roll wedges starting at wide end; roll gently but tightly. Place point side down on ungreased cookie sheet. Cover with clean kitchen towel and put in a warm pla ce, let rise 1 hour. Meanwhile, preheat oven to 400 degrees F (200 degrees C).
  3. Bake in preheated oven for 10 to 15 minutes, until golden.

Ultimate Twice Baked Potatoes

(source allrecipes.com)
  • 4 large baking potatoes
  • 8 slices bacon
  • 1 cup sour cream
  • 1/2 cup milk
  • 4 tablespoons butter
  • 1/2 teaspoon salt
  • 1/2 teaspoon pepper
  • 1 cup shredded Cheddar cheese, divided
  • 8 green onions, sliced, divided

Bake potatoes for 1 hour at 350°. Meanwhile cook and crumble bacon. When potatoes are done allow them to cool for 10 minutes. Slice potatoes in half lengthwise and scoop the flesh into a large bowl; save skins. To the potato flesh add sour cream, milk, butter, salt, pepper, 1/2 cup cheese and 1/2 the green onions. Mix with a hand mixer until well blended and creamy. Spoon the mixture into the potato skins. Top each with remaining cheese, green onions and bacon. Bake for another 15 minutes.

For dessert I will be making my mom's famous strawberry cake. Look for the recipe next week. It is so worth the wait!

What are your favorite Easter recipes?

White Turkey Chili

Wednesday, March 23, 2011

My favorite thing to make is soups. I'm not sure why. Maybe it is because they are usually a one pot dish, make great leftovers, freeze beautifully and taste delicious. But summer is soon approaching (which I am totally thrilled about) but I thought I would try to sneak in a soup recipe before it gets to hot. This white chili is really delicious and quick to make. It has got an ingredient that you would think totally ruin the dish but in this instance it totally enhances the flavor.

White Turkey Chili
1 onion, chopped
3 gloves garlic, minced
1 pound ground turkey
1 can diced green chilies
1 tablespoon cumin
1/2 tablespoon oregano
1/4 teaspoon Cinnamon
Cayenne pepper to taste
salt to taste
2 cans cannelloni beans
4 cups chicken broth
1 cup shredded Monterey jack cheese


Brown the onion, garlic and turkey until turkey is cooked all the way through. Add the green chilies, cumin, oregano, cinnamon, cayenne, salt and pepper. Saute for a few more minutes. Next add 1 can of the cannelloni beans and chicken broth. With the other can puree them in a food processor (or blender). Add to the pot. Allow to heat through and simmer for 10 minutes. Throw in the cheese until melted. Top with extra cheese, sour cream, tortilla chips, or whatever sounds great to you!


Related Posts Plugin for WordPress, Blogger...
Blog contents © better together 2010. Blogger Theme by Nymphont.