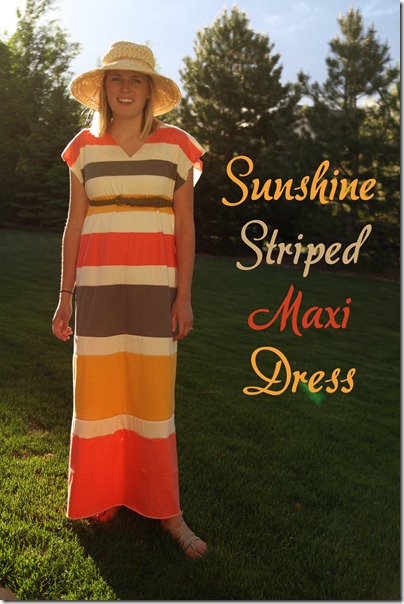
Sunshine Striped Maxi Dress

Friday, June 15, 2012

This was my submission for Sunshine week over on SYTYC. Today I wanted to share the tutorial on how to create it. It is super easy!

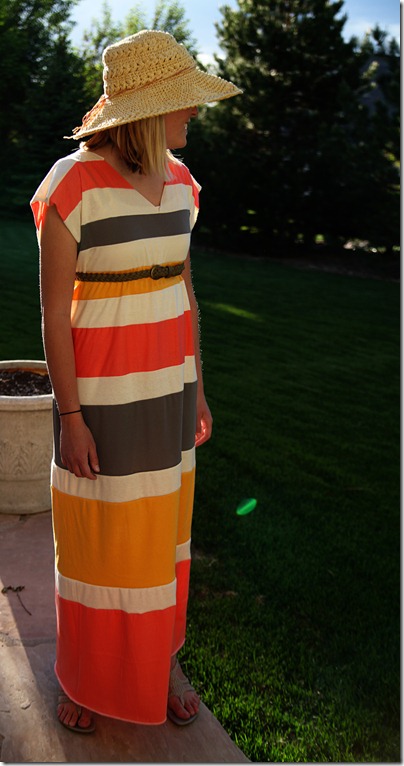
When I think of sunshine, I think of warmth. I think of the beach. I think of lazy days by the pool. Most of all I think of Summer. What could be more perfect for all of those things than a comfortable bright striped maxi dress.
IMG_0617 copy

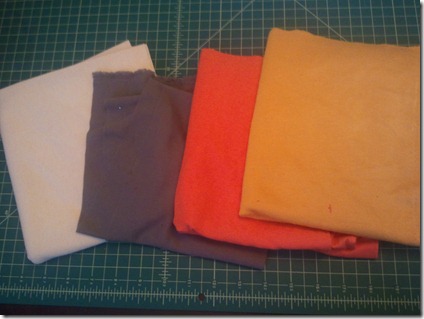
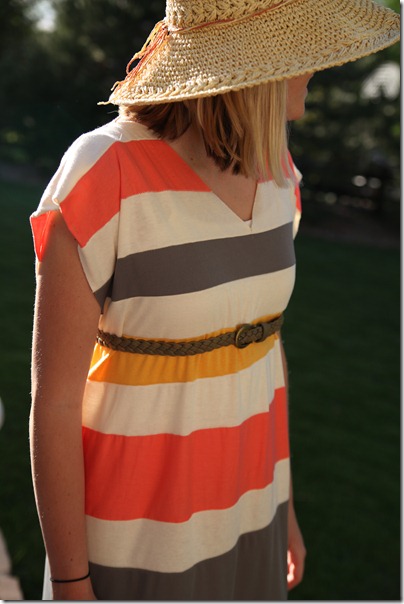
This dress was constructed from multiple colors of jersey fabric. The solid colors of jersey were cut into various size stripes and then sewn together to create a unique striped and colorful pattern.
IMG_0623

This is the perfect dress to celebrate sunshine and summer. It is the perfect swimsuit cover up to wear to the pool or to the beach. It is the perfect dress to wear on a summer evening walk, or just to sport around town. It is just perfect for any activity on a sunshiny day.
IMG_0628 copy

What you’ll need:

1/2 yard each of four different colors of knit fabric
1/4 inch elastic (How much? Enough to fit around your waist.)
2012-05-21 17.11.46

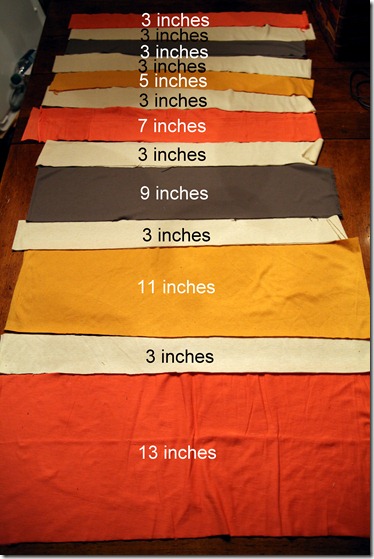
The first thing you are going to do is create your pattern. You will want to measure from your shoulder to your feet then add 3 inches to get the exact amount of stripes you will need to cut. For example: It is 56 inches from my shoulder to my feet. I cut 59 inches worth of stripes, because once you sew the stripes together you are going to loose about 3 inches of material.

I cut each cream colored stripe at 3 inches. Then I tapered the colored layers. The bottom color was 13 inches. Then the next color was 2 inches shorter than that, and and the next 2 inches shorter than that, and so on. You can see the dimensions in the image below. 
IMG_0496
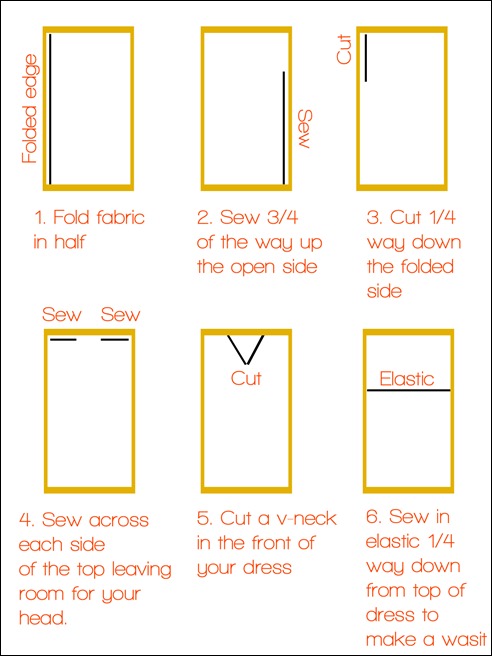
Once you have sewn your pattern together it is time to sew the dress. It can be completed in 6 easy steps.

*I have kept the instructions pretty general. I left out specific measurements. You can decide for yourself how big you want the arm holes, and where on your waist to place the elastic, or how deep and wide of a v-neck that you want for your body. If you do want more specific measurements just send me an email and I would be happy to share what I used for my dress.
tutorial sunshine dress

As an optional step 7: You can hem all of your open edges around the arm holes, neck, and bottom of the dress. You can also leave it un hemmed since you are working with knit and it wont unravel.

Let me know if you have any questions.
41D7BC788C40AFDD713E5833753FB8F5

No Excuses Week #3

Wednesday, June 13, 2012

Excuse #3: I find exercising boring

Exercising doesn't have to be boring. There are so many variations to make exercise more fun.

Here are some tips to help making exercising more fun:

1. Find a fitness facility that specializes in group exercise classes. There is a gym in my area that offers zumba, kickboxing, yoga, pilates, cardio sculpt, power tone. They are offered at all different times in the day and on different days throughout the week. This is a great way to vary the kind of workouts you are doing and make it fun at the same time. For me it is a good $25 well spent. The other great thing about this is that you get to do it with friends and meet new ones as you continue to go.

2. Take up sport you have never tried before. Try enrolling in tennis or golf lessons.  These are two great sports that can be really fun and social. Join a tennis group or find a gold buddy. The more you branch out and try something new, the less you might get bored with doing your regular routine.

3. Add a friend to your exercise programming. Taking walks or joining a sport with your spouse or friend can be added benefit. 


Not only is varying your exercise fun it also has great physical benefits as well. The more your body does an exercise routine the more your body adapts to it. It eventually stop seeing results or seeing results will take a longer time. By always changing your workout routine you have the potential to see results faster and enjoy it more at the same time.

Goal: Try one new sport or activity you have never tried before!

No Excuses Week #2

Tuesday, June 5, 2012


Excuse #2 : I am too embarrassed and uncomfortable to go to a gym.

Exercising can feel intimidating at times. You might avoid going because you don't know how to use the equipment or what to do when you get there. If you fit that category, let's look at how to move past it.

I have listed some ways to make sure you still get a workout if you don't feel comfortable in a gym. 

1. Pick up some light dumbbells from the store; there are endless things you can do with them. Click here for a great list of exercises you can do at home. 

2. Go to your local library and pick up workout DVD's. The great thing about a lot of these DVD's is that the instructor in most videos makes sure there are modifications to each exercise so you don't have to be concerned about not being able to follow what he or she does. There is always a way to make sure you get the best benefit for your body.

3. Use a game console. Many game consoles such as the Wii, Xbox and Playstation now have exercising games. Zumba is one of those games. It is great to do at home because many people are afraid to do it with a class because they are afraid they won't keep up. By doing it at home you are able to still have a great time but don't have to feel self concious if you dont know all the moves. 

4. Move around with your kids. If you don't like going to the gym then take advantage of playing with your kids throughout the day. Whether it is at the park or in the backyard, make get physical activity by playing with your kids.

If going to a gym is not your thing, don't make it an excuse not to get some exercise in your day. Working out at home can be just as successful as working out at a gym. No more excuses!

Time to Celebrate Fathers!

Monday, June 4, 2012

It is that time of year to celebrate Fathers everywhere! You don't have to remind me about this holiday. I'll take any excuse to celebrate my husband or my father. They are pretty awesome!
 
So in honor of the upcoming holiday we have made some printables to help make Fathers day even more special. They are both interviews about dads that you can do with your kids.
 
The first printable offers an interview that can be answered through words.
 
While the second printable offers an interview that can be answered through pictures.


I love the idea of having an interview with my kids about their father every year. My son is still a little young to understand how to answer these questions. I created the second printable that will answer the questions through pictures of my husband and son together.
I plan to keep all of these interviews in one big scrap book. I'll add to the book every year.  There are so many fun ways to do this interview.
 
I love this idea of framing the interview. I think I'll have to do this on Father's Day.

I also love this idea of creating a digital book every year with the interview questions.
If you are interested in downloading our Father's Day printable just head on over to our Facebook page. Both printables are available to all of our Facebook friends. If you already like us on Facebook, just click on the Free Gift box at the top of our page.

*Update: These are now available on our blog under our printables tab

Doorway Puppet Theatre

Thursday, May 31, 2012


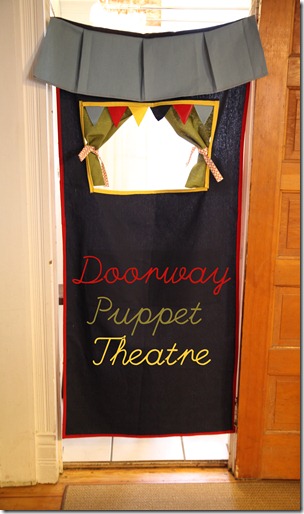
For Kids Can Do week I made a doorway puppet theatre.
 
IMG_0853 copy

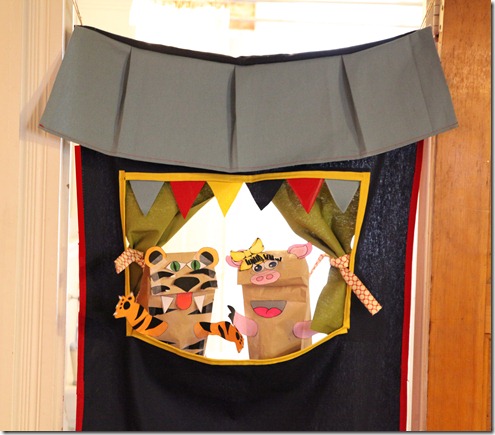
Then my son and a good friend of his made some paper bag puppets for a puppet show. I got the print outs for the puppets from DLTK's Growing Together website. 

collage 1

Here is a closer look at the puppet theatre. I used left over fabric from my Backyard Beach project. This would be super easy to create with a drop cloth or a sheet or a curtain, really anything that is already hemmed, just like this one from Kojo Designs. Since I was trying to use fabric that I already had, I added the red binding myself. I topped the theatre with a pleated awning. I also added a colorful bunting to the top of the window.
collage 2
 
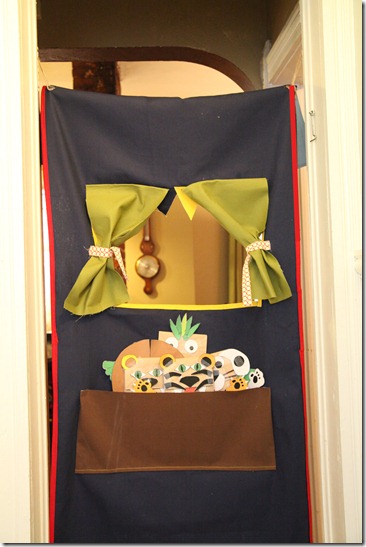
Here is a look at the backside of the theatre. I added a pocket to hold all of the puppets.
 
IMG_0886 copy
 
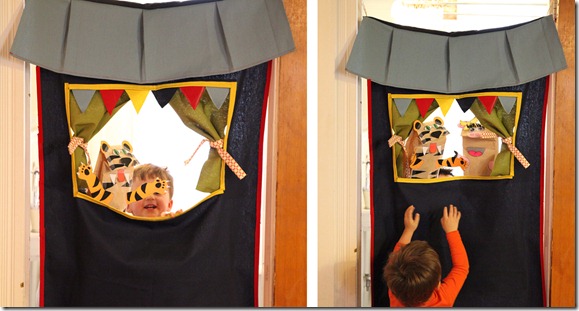
It is so fun to play with whether you are behind the curtain or just watching the show.
 
collage 4
 
We love our new puppet theatre!
 
IMG_0924 copy


It also provides a fun new way to play with our Disney Pook-A-Looz Puppets.

DSC03658

Spring Veggie Hummus Wrap

Wednesday, May 30, 2012

IMG_1038 copy

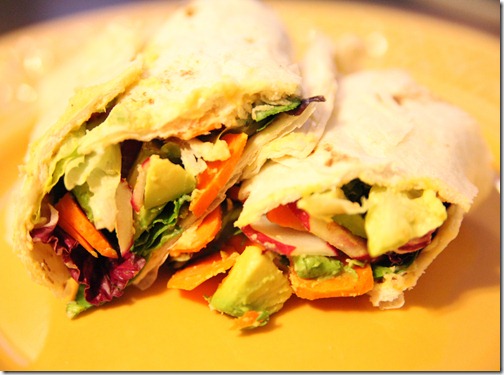
I officially have a new obsession! It is this very delicious hummus wrap. I am not the only one in love. My husband begs me to make this for him on a regular basis. I originally was given the idea for this from a friend who was telling me about a yummy sandwich she had with radishes and carrots. I thought it sounded kind of odd at first. I don’t eat radishes very often and I wasn’t even sure that I liked them. When I saw some at the store the other day I picked a few up and decided to give them a try. I am so glad that I did.

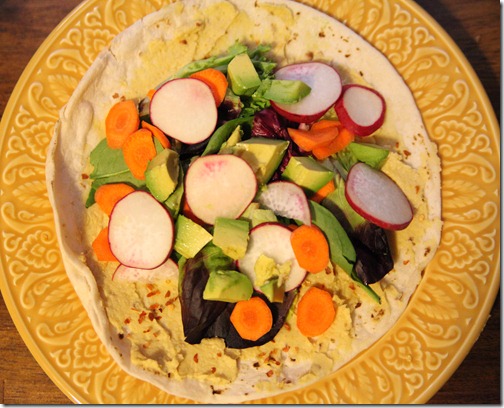
Here is how I assembled my hummus wrap. I’ll be honest I am not exact in my measurements when I make this. I’ll do my best to guess. It will still be yummy even if there are a few extra carrots :)
Serving for one:
  • 1/2 Carrot sliced
  • 1 1/2 Radishes sliced
  • 1/2 Avocado
  • Handful of Spinach
  • Handful of Baby Arugula
  • 1/2 teaspoon Red Pepper Flakes
  • Hummus
  • Tortilla
Spread a layer of hummus on to your tortilla. Next sprinkle the red pepper flakes on to your hummus. Then top with your spinach, baby arugula, carrots, radishes, and avocado.

Look at all of those yummy veggies!

IMG_1030 copy

The red pepper flakes give it just the right amount of heat. I love the crunch of all the veggies. Give this a try, you will not be disappointed.
41D7BC788C40AFDD713E5833753FB8F5

No More Excuses

Tuesday, May 29, 2012

In light of the most recent Biggest Loser Season I thought I would do a spin off of the "No Excuses" campaign, which encourages contestants to forego their excuses for bad habits. With that in mind, each of the next four Tuesdays I'll debunk common excuses reasons for not exercising and living healthy.

Excuse #1: I don't have time...


This is pretty common. Like most of you, my days are jam-packed. I believe that for each one of you there is time. Whether it is 20 minutes or an hour, exercise and eating right can happen.

Here are some ideas: 

1. Break it up: 10 minutes here, 20 minutes there — it adds up. You might not have a full 30-minute block of time in your day, but that doesn't mean you can't break up your exercise. Go on a 10-minute walk at your lunch break. Get up just 20 minutes early to get in a quick walk, run or bike ride.

2.  Incorporate exercise into your daily routine: Without having to add extra time, mix exercise into things you already do, such as parking farther away from the office and walking in. Or walk to a park to eat your lunch, or maybe volunteer to be your child's sports team coach and exercise with them during practice.

3. Plan ahead: Planning ahead is extremely important when trying to exercise and eat healthy. Make it a goal to set aside 30 minutes on one day during the week to plan out your meals for the week and go buy those ingredients. It is easy to use the excuse of "I dont have time to cook or to exercise" when you have not already planned what you are going to do. By planning ahead you will have set more time aside for the things that important.

4. Add it to your scheduler: Make exercise an item that is on your daily list. By making it a priority and a part of your everyday routine, you are more likely to get it done. Make it another item on your list that must get done before your day can be over.

Upcycle- iPad Case

Wednesday, May 16, 2012

Angela is competing on So You Think You Are Crafty. Voting for Week 6- Sunshine Week is up over on SYTYC- don’t forget to go vote for your favorite project. Thanks!
_________

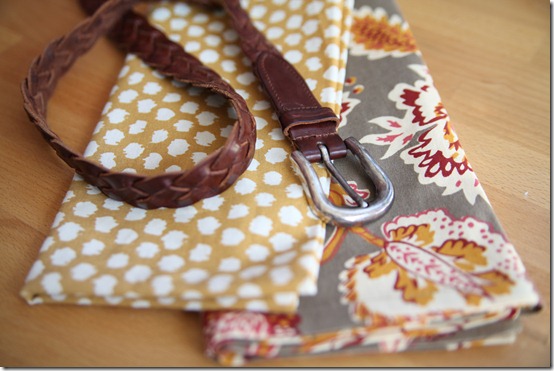
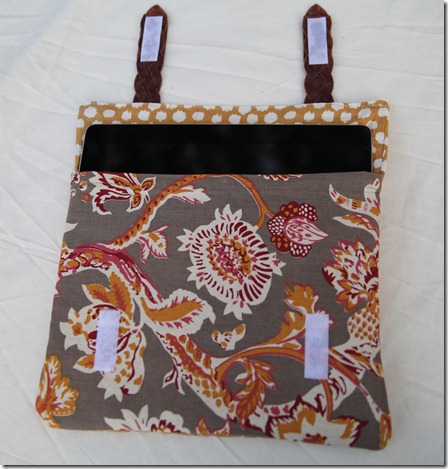
Last week was upcycle week. I took two napkins (both purchased from World Market) and one thrifted belt…
IMG_0344

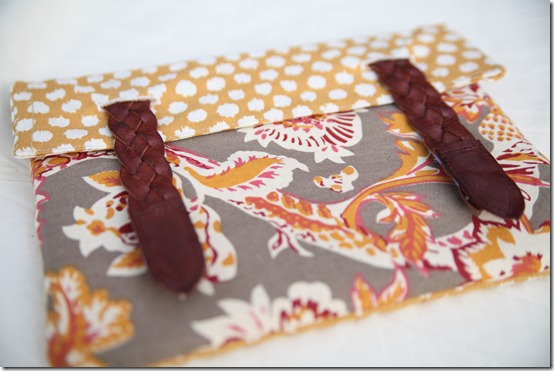
I created my own iPad case.
IMG_0446
Would you like to make one? It is super easy. Let me show you how.

What you will need:
  • 2 napkins
  • 1 belt
  • 2 8 x 11 inch pieces of fleece
  • Velcro
  • Glue gun
  • Sewing machine

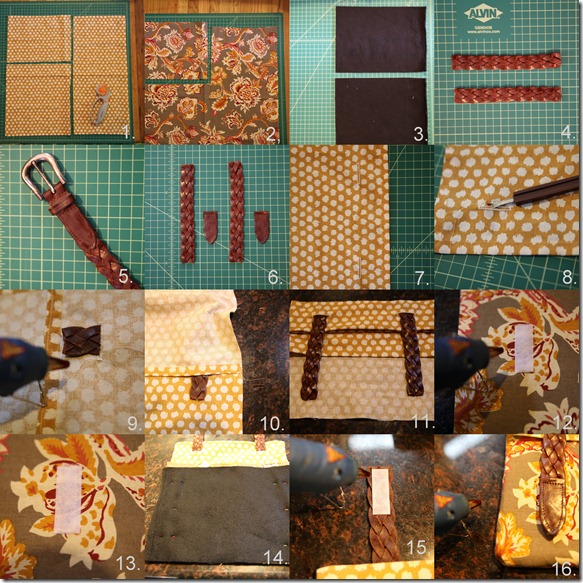
How to assemble your iPad case:
1. Cut the fabric for the back side and top flap of your case. You need to cut two pieces. Cut one piece 8 x 11 inches. The other cut 11 x 11 inches.
2. Cut the fabric the front side of your case. Cut one piece 8 x 11 inches.
3. Cut two pieces of felt 8 x 11 inches.
4. Cut two pieces from your belt each 6 1/2 inches long.
5. Cut off the pointy end of your belt. (I don’t know what it is called. Feel free to fill me in on what it is called. )
6. Cut the pointy end in half. You should now have two pointy ends. One from the front of your belt and one from the back of the belt. See picture below or let me know if you need a better explanation.
7. Sew two button holes on your 8 x 11 inch piece of fabric you cut for the top flap of your case. The buttonholes should be the same width of your belt. They should be located 2 inches from the side of the top flap, and two inches from the bottom of your top flap.
8. Open your button holes with your seam ripper.
9. Pull your belt through the buttonhole on your top flap and glue it to the backside of your fabric.
10. Sew together your top flap with the belt glued in to your 11 x 11 piece of fabric you cut for the
 backside of your case. Make sure the front side of the fabric is facing each other. It should be a little lumpy with the belt, but just hold the fabric as tight and straight as you can as it goes through your sewing machine.
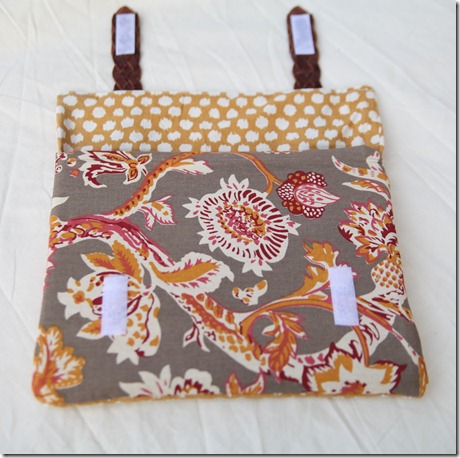
11. Once you turn the fabric right side out it should look like what you see in the image.
12. Glue on your Velcro to the 8 x 11 piece of fabric you cut for the front of your case. I cut my Velcro 1 3/4 inch long. I placed it 2 inches from the side and 1 1/2 inches from the bottom.
13. Sew on the Velcro.
14. Pin your fabric together in the following order: Felt piece #1, Backside/top flap fabric(with belt), front fabric(with velcro)  , felt piece #2. Sew around the 3 outside edges.
15. Turn inside out. Then glue the other side of your velcro to your belt.
16. Remember those pointy ends of your belt? Glue those to the top of your belt. Then you are finished!
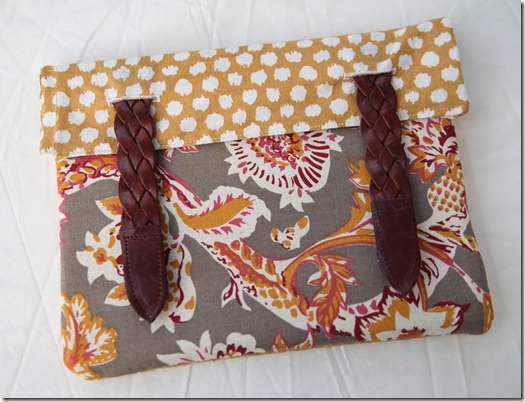
iPad Case

Front side
IMG_0425

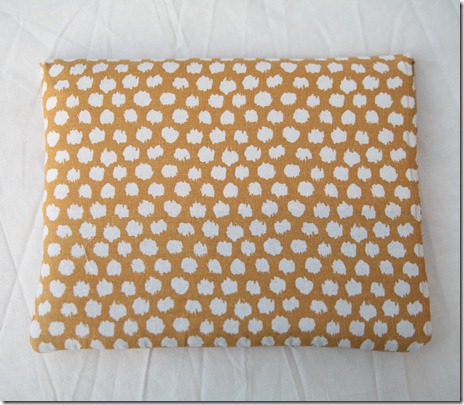
Backside
IMG_0427

Inside without iPad.
IMG_0429

Inside with iPad.
IMG_0433

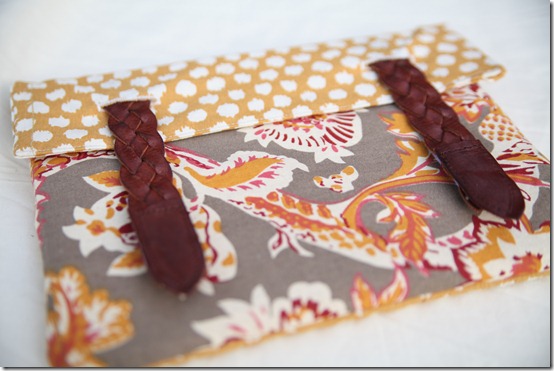
I love my iPad case!
IMG_0446
Let me know if you have any questions on how to make your own.
41D7BC788C40AFDD713E5833753FB8F5

Pacifier Clips

Tuesday, May 8, 2012

Voting for Week 5- Up cycle Week is up over on SYTYC- don’t forget to go vote for your favorite project. Thanks!
_____________

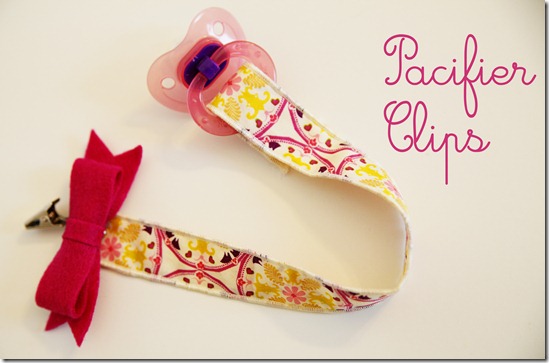
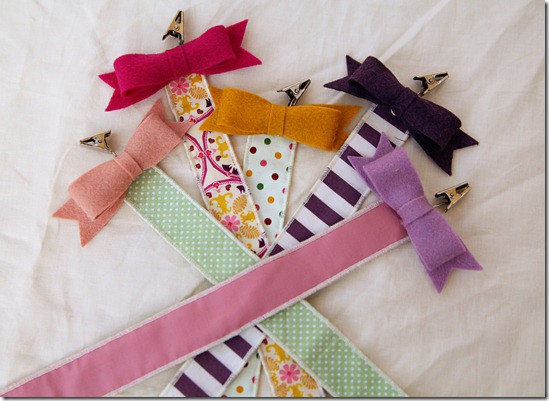
For scrap week I chose to make pacifier clips. These will shortly become a necessity in our home as my baby girl will be here in about 6 weeks.

IMG_0259 copy

Pacifier clips are the perfect way to use up any left over scraps of fabric, felt, lace, or ribbon. And since I have an unhealthy obsession with felt, and keep every last scrap of it. Adding cute felt bows to the end of each pacifier clip was a perfect way to use up some of the felt that I seem to hoard.

collage_edited-2

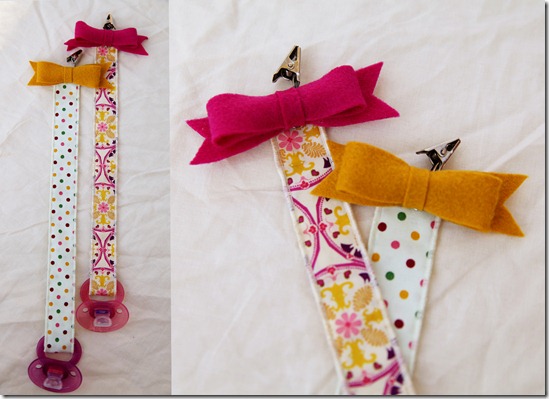
I basically used MADE’s pacifier clip tutorial from Sew Mama Sew. I cut 2 inch x 14 inch pieces of fabric. I folded the fabric in half, and then I used a rolled hem to sew the edges. I also sewed Velcro to the ends of the fabric. My only alteration to the original tutorial was that instead of using suspender clips, I used badge clips- you know the ones that you use for a name tag at work. Badge clips are a much cheaper option. If you go to Joann's or your local craft store, a 2 pack of suspender clips costs $3. A pack of badge clips also costs $3, but you get 21 of them. Since I was planning to make a bunch of these I went with the cheaper option.

If you want to go with the badge clip option, it is pretty simple.

1. Use hot glue to glue on the badge clip. 2. Then to protect from the sharp end of the badge clip, glue on a felt bow.

collage 2_edited-1

The felt bow adds a cute touch to the pacifier clip. It also protects from the pointy edge of the badge clip.

IMG_0294 copy 2

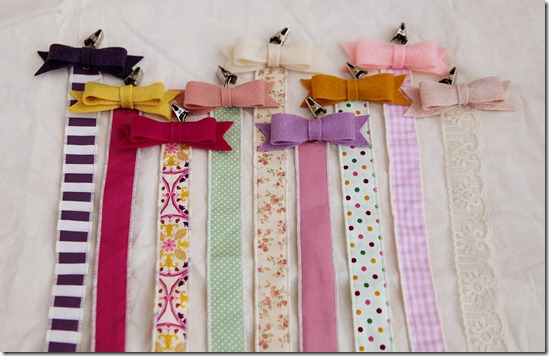
Here are a few of my favorite ones. Although, really I love them all!

IMG_0311 copy 2

These are super simple to create. You can use your old scraps to create them. They also make the perfect gift. I’ve got lots of pregnant friends. I also have a sister and a sister-in-law that are due the same week as me. I have a feeling that I will be making a lot of these.

41D7BC788C40AFDD713E5833753FB8F5

Avocado Corn Salad with Honey Cilantro Lime Dressing

Sunday, April 29, 2012


 With my mom in town last week I decided to try a new recipe for her.

This recipe would make a great salsa or even side dish to any summer meal.


Honey Lime Dressing:
Juice of 1 lime
3 tbsp vegetable oil
1 tbsp honey
Sea salt and fresh cracked pepper, to taste
1 clove garlic, minced
Dash of cayenne pepper
Combine all dressing ingredients in a small bowl. Whisk together and lightly toss over the fresh ingredients. Let the salad sit for 10 minutes. 


 Fresh Ingredients: 

1 pint grape tomatoes

1 ripe avocado

2 ears of fresh sweet corn

2 tbsp fresh cilantro, chopped

(I substituted with frozen corn because corn is not quite in season yet, use about 1/2 cup)


It was delicious to say the least! 


Book Lamp

Tuesday, April 24, 2012

Incase you were not aware, Angela is competing in Season 11 of So You Think You're Crafty. Voting for week 3 is up. This week is knock-off week. Head on over to vote for your favorite project.
_______
  
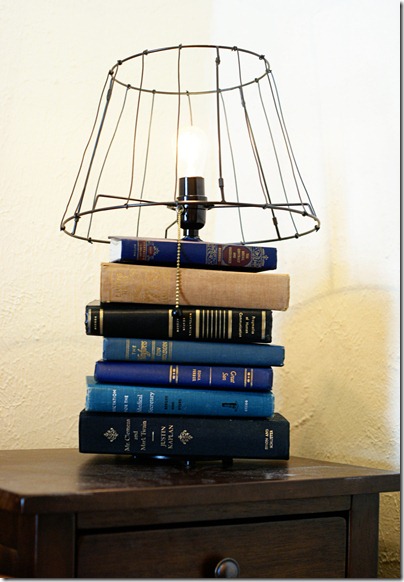
Last weeks theme for the competition was thrift store. I had been wanting to make this book lamp for quite some time. I was glad that I finally had an excuse to get it done.

I really enjoyed working on this project. I got to use a drill. I also learned how to re wire a lamp. It was fun doing something a little different than I normally do when it comes to crafting.
 
SONY DSC

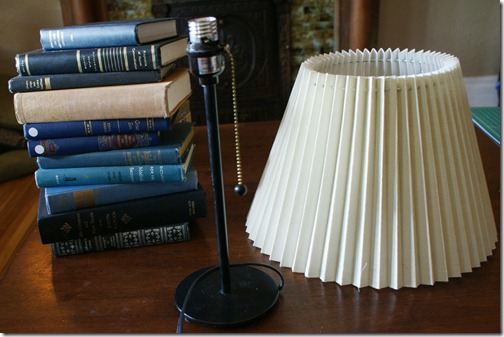
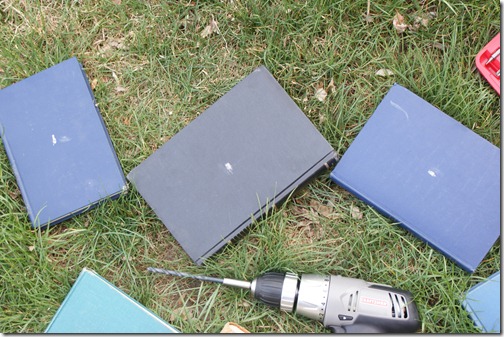
The lamp was not that hard to put together. I started with a few old books, a lamp, and a lamp shade all purchased from the thrift store.

DSC03478 copy

I first measured to find the center of each book. I made sure to mark that spot.

DSC03504

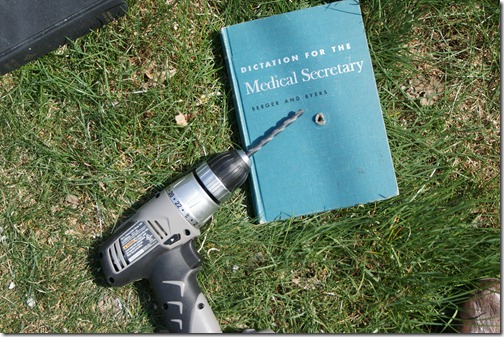
Then I drilled holes through the center of the books.

DSC03505

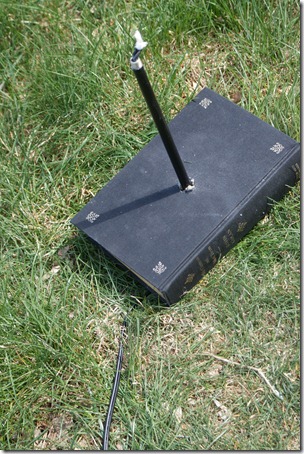
Then I got to de wire the lamp. I used this diagram that I found on pinterest. It clearly explains how to do so. And after the lamp was stripped down to its skinniest, I slid the books down the lamp.

DSC03508

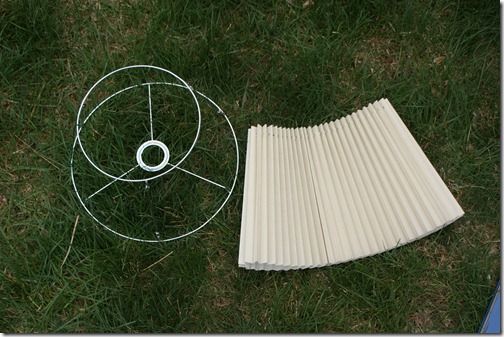
Next I took the shade off of the lamp. I just wanted to use the base.

DSC03512

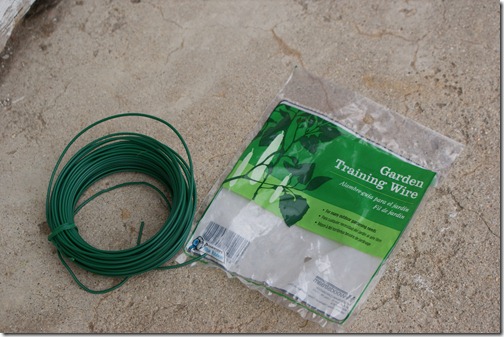
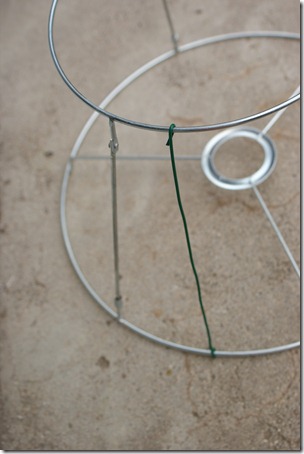
I wanted the lamp shade to have the look of a wire basket. I took gardening wire, which is really easy to manipulate, and I wrapped strands around the bare lamp shade…

DSC03513

…just like so. Once I had added enough wire, I spray painted it a metallic bronze color. I was was working on this project outside, just as I started to spray paint the shade it started to rain. I had to hurry and get the lamp and all of the tools inside. I forgot to get a picture of me painting the shade. I think we all know what that looks like.

DSC03517

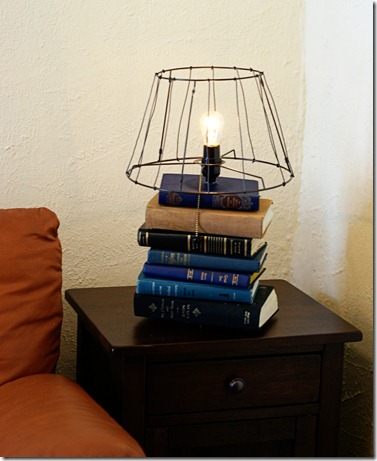
And then all I had to do was rewire the lamp, using that same diagram from above. Then ta da… I know have my very own book lamp.

SONY DSC
SONY DSC
SONY DSC
41D7BC788C40AFDD713E5833753FB8F5
Related Posts Plugin for WordPress, Blogger...
Blog contents © better together 2010. Blogger Theme by Nymphont.